Quick Overview: Why Proper Chipboard Flooring Orientation Matters
Correctly orienting and installing chipboard flooring (especially popular P5 tongue-and-groove panels) is essential for a solid, squeak-free subfloor that lasts. Key benefits include:
- Better load distribution across joists
- Reduced risk of cracks in tiles or other finishes
- Prevention of buckling from seasonal expansion/contraction
- Easier, more efficient installation with less waste
Follow these best practices: lay boards perpendicular to joists, stagger joints, leave expansion gaps, acclimatise boards, and plan your layout carefully. Done right, you'll get professional results that support everything from carpet to ceramic tiles.
1. Understand the Core Orientation Rules
The foundation of a strong chipboard floor starts with how you position the panels.
- Lay long edges perpendicular to joists — This maximises support under each board and creates the strongest possible floor.
-
Stagger end joints (short edges) — Never let joints line up in a straight line across rows (think brickwork pattern). Aim for at least a 300mm offset between end joints in adjacent rows — more is better.
- Why? It distributes weight evenly, avoids weak continuous lines, and prevents stress cracks showing through finishes like tiles or stone.
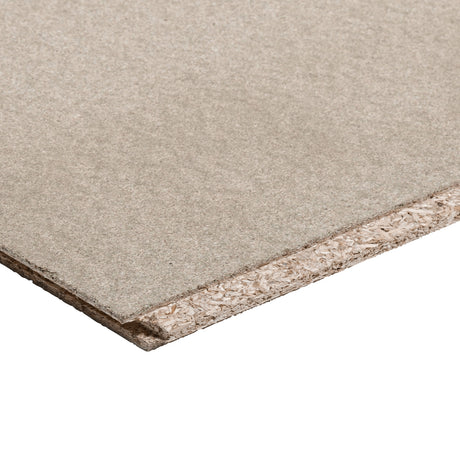
2. Tongue-and-Groove Specifics: Get the Direction Right
Most UK chipboard flooring uses tongue-and-groove (T&G) edges for tight, seamless joints.
- Boards have a tongue (protruding edge) on one long side and one short side, with grooves on the opposites.
- Always start with grooved edges against walls or existing boards — tongues face into the room for the next boards to slot in.
- Look for manufacturer markings: arrows, "This side up," or tongue/groove indicators printed on the boards.
- Tip: Install consistently from one direction to avoid mismatched joints when sections meet.
Mixing directions can make interlocking impossible — plan ahead!
3. Essential Expansion Gaps — Don't Skip This!
Chipboard expands and contracts with humidity and temperature changes — ignoring this leads to buckling or lifting.
- Leave a minimum 10mm gap around all perimeters (walls, pipes, stair stringers, etc.). Use spacers during installation.
- For large areas (>7-8m in any direction), add intermediate expansion gaps — place them at logical breaks and cover with trim strips later.
- Pro tip: Plan gaps during layout so they don't disrupt the room's appearance.
4. Smart Starting Position and Layout Planning
A good start sets up the whole job for success.
- In rectangular rooms: Begin in the corner farthest from the entrance — work toward the door to avoid walking on fresh boards.
- For irregular shapes: Use the longest wall as your reference — snap chalk lines or fix temporary battens for a straight, square start.
- Dry-lay (or calculate) first: Avoid narrow strips (<200mm) at edges by adjusting the starting position. Split shortfalls evenly between opposite sides for balance.
- In hallways/corridors: Run long edges parallel to traffic flow — fewer cross-joints underfoot mean better durability.
- Around doorways: Position joints away from thresholds to handle high-traffic wear.
5. Joist Support and Layering Requirements
Orientation must match the substructure.
- 18mm P5 chipboard: Max 450mm joist centres.
- 22mm boards: Up to 600mm centres.
- Over existing floorboards: Lay new chipboard perpendicular to the old direction for cross-layer strength.
- Over engineered joists (I-beams, metal web): Check manufacturer guidelines — they may have specific orientation/fixing rules.
- Unsupported edges? Add noggins — never leave board ends hanging.
6. Fixing Methods: Choose and Stick to One
How you fix affects orientation flexibility.
- Face fixing (screws straight down): Easier sequencing, but visible heads need countersinking/filling.
- Secret fixing (angled screws through tongue): Cleaner look, but requires strict one-way installation sequence.
- Best practice: Use adhesive on joists and in grooves (e.g., D4 PU glue) + screws at regular centres (typically 150mm edges, 300mm field).
- Consistency matters — don't mix methods mid-floor to avoid uneven movement.
7. Room-Specific and Finish Considerations
Adapt for your space.
- Bathrooms/kitchens: Orient to simplify cuts around pipes and fixtures — ensure solid support near penetrations.
- Tiled areas: Avoid aligning board joints with tile joints where possible to reduce crack risk.
- Visible finishes (varnish, light laminates): Consider joint patterns for aesthetics, not just structure.
- Specialist boards (acoustic, locking systems): Follow manufacturer directions — they override general rules.
8. Pre-Installation Prep: The Often-Forgotten Step
Great orientation means little without proper conditioning.
- Acclimatise boards in the installation room for at least 48 hours (flat, stacked properly) — this lets them adjust to humidity/temperature.
- Why? Reduces post-install movement, fixing stress, and squeaks — especially moving from cold storage to heated homes.
Final Thoughts
Proper chipboard flooring installation isn't complicated — it's about planning, staggering, spacing, and following proven patterns. Get these right, and you'll have a rock-solid base ready for any finish.
At DIY Building Supplies, our chipboard flooring collection comes with detailed guidance, and our team is happy to advise on tricky layouts or specialist needs. Happy fitting — your perfect floor starts here!