A comprehensive step-by-step installation guide for creating a stunning garden patio using paving kits and circle features
There's something truly magical about stepping into your garden and seeing a beautifully laid patio that serves as the perfect foundation for outdoor living. Whether you're envisioning lazy Sunday morning coffees in the sunshine, hosting summer barbecues with friends and family, or simply creating a peaceful retreat where you can unwind after a long day, a well-designed patio becomes the heart of your outdoor space. More than just an aesthetic enhancement, a professionally finished patio can significantly boost your property's value whilst providing years of enjoyment for you and your loved ones.
The beauty of modern paving solutions lies in their accessibility to DIY enthusiasts. Gone are the days when creating a stunning patio required expensive professional contractors or years of masonry experience. Today's paving kits and circle paving features have revolutionised garden design, offering homeowners the opportunity to achieve professional-quality results with careful planning and the right guidance. These innovative solutions eliminate much of the guesswork traditionally associated with patio installation, providing pre-designed patterns and perfectly sized components that fit together like pieces of a sophisticated puzzle.
At DIY Building Supplies, we've witnessed countless transformations where ordinary garden spaces have been elevated into extraordinary outdoor living areas through the strategic use of quality paving materials. This comprehensive guide draws from our extensive experience working with DIY enthusiasts and trade professionals across the UK, providing you with the expert knowledge needed to tackle your patio project with confidence. We'll walk you through every stage of the process, from initial planning through to the finishing touches that will make your patio the envy of the neighbourhood.
Why Choose Paving Kits for Your DIY Project?
The decision to use a paving kit rather than individual slabs represents one of the smartest choices you can make for your DIY patio project. These carefully curated collections offer numerous advantages that extend far beyond simple convenience, fundamentally changing the entire installation experience for the better. When you invest in a quality paving kit from trusted British manufacturers like Marshalls, Brett Paving, or Bradstone, you're not just purchasing materials—you're investing in a complete solution that's been engineered for success.
Pre-designed precision forms the cornerstone of every quality paving kit. Each component has been specifically cut and sized to eliminate the need for complex calculations or time-consuming cutting on site. This precision engineering means you can focus your energy on the installation process rather than worrying about whether your measurements are accurate or if your cuts will align properly. The result is a more enjoyable project experience and significantly reduced risk of costly mistakes that could compromise your finished patio.
The variety and versatility available in modern paving kits truly sets them apart from traditional approaches. Whether you're drawn to the warm, natural tones of Indian sandstone, the classic elegance of limestone, or the contemporary appeal of concrete pavers, you'll find kits designed to suit every architectural style and personal preference. Many kits offer multiple size combinations within a single pack, creating natural variation that mimics the organic patterns found in traditional stone installations whilst maintaining the precision that ensures perfect fit.
Circle paving kits deserve special mention for their unique ability to create focal points that transform ordinary patios into extraordinary spaces. These sophisticated systems can serve multiple purposes within your garden design, functioning beautifully as centrepieces for seating areas, elegant surrounds for fire pits or water features, or as standalone decorative elements that break up larger paved areas. The geometric precision of circle kits creates visual interest whilst maintaining the harmonious proportions that characterise truly professional installations.
The cost-effectiveness of paving kits becomes particularly apparent when you consider the total project investment. By purchasing pre-coordinated materials, you eliminate waste associated with cutting individual slabs and reduce the likelihood of ordering incorrect quantities. This efficiency extends to the installation process as well, where the simplified layout procedures can significantly reduce project timelines, getting you back to enjoying your outdoor space sooner rather than later.
Essential Tools and Materials for Professional Results
Success in any paving project begins with proper preparation, and nowhere is this more critical than in assembling the right tools and materials before you begin. The difference between a professional-looking finish and an amateur attempt often comes down to having the correct equipment and using quality materials throughout the process. Based on our experience supplying thousands of successful DIY projects across the UK, we've identified the essential components that separate outstanding results from disappointing outcomes.
Foundation tools form the backbone of any successful paving installation. A quality shovel and sturdy wheelbarrow will serve you throughout the excavation and material transport phases, whilst a reliable tape measure and string line ensure your layout remains accurate and square. These might seem like basic items, but investing in quality versions will pay dividends in terms of efficiency and accuracy throughout your project. A spirit level becomes your best friend during installation, helping you maintain consistent slopes for proper drainage whilst ensuring each slab sits perfectly level with its neighbours.
Compaction equipment represents one of the most critical investments for long-term patio success. Whilst a manual tamper might suffice for smaller projects, we strongly recommend considering a plate compactor for patios exceeding 10 square metres. Proper compaction of your sub-base materials prevents future settling that could lead to uneven surfaces or cracked slabs. Many of our customers initially hesitate at this expense, but the peace of mind that comes with knowing your foundation is properly prepared proves invaluable over the years to come.
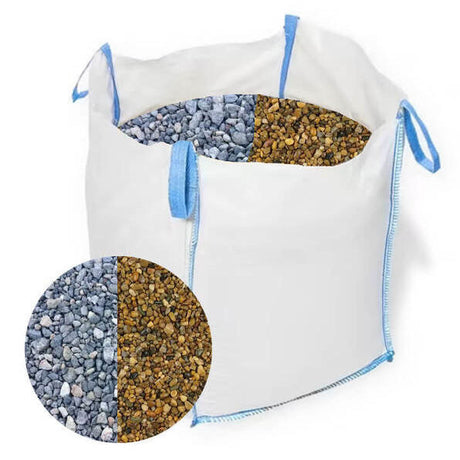
Quality materials extend far beyond the visible paving slabs themselves. The sub-base material, typically MOT Type 1 aggregate, provides the foundation upon which your entire patio depends. This carefully graded mixture of crushed stone creates the stable, free-draining base essential for preventing movement and ensuring longevity. Sharp sand and cement for your mortar mix might seem like minor components, but using the correct ratios and quality materials here directly impacts the strength and durability of your finished installation.
Specialist accessories often make the difference between acceptable results and truly professional finishes. Weed control membrane prevents unwanted growth from compromising your sub-base, whilst quality jointing compounds ensure weather-tight seals between slabs. These materials represent a small fraction of your total project cost but contribute significantly to the long-term performance and appearance of your finished patio.
Comprehensive Step-by-Step Installation Guide
Planning and Layout: The Foundation of Success
Beginning any paving project with thorough planning prevents countless problems during installation and ensures your finished patio meets your exact requirements. The planning phase allows you to visualise the final result whilst identifying potential challenges before they become expensive mistakes. Professional installers understand that time invested in careful planning typically saves hours during the actual installation process, leading to better results with less stress and frustration.
Accurate measurement forms the cornerstone of effective planning. Take multiple measurements of your intended patio area, noting any irregularities in shape or obstacles that might affect your layout. Consider how your patio will connect to existing structures like your house, garden paths, or established landscaping features. The relationship between your patio and these elements significantly impacts both the visual appeal and functional effectiveness of your finished space.
Layout visualisation becomes much easier when you perform a dry lay of your chosen paving kit. This process involves arranging the slabs in their intended pattern without mortar, allowing you to see exactly how the finished patio will appear. During this phase, you can experiment with different starting points, adjust the positioning to minimise cutting requirements, and ensure the pattern flows naturally within your available space. Many of our customers find this step reveals opportunities for enhancement they hadn't previously considered, such as incorporating decorative borders or creating interesting pattern variations.
Excavation and Preparation: Building the Right Foundation
Proper excavation requires more precision than many DIY enthusiasts initially realise. The depth of your excavation depends on several factors, including soil conditions, intended use, and local drainage requirements. For most domestic patios, excavating to a depth of 150-200mm provides adequate space for sub-base materials and the mortar bed, but challenging soil conditions or heavy use areas might require deeper preparation. Take time to ensure your excavated area maintains consistent depth whilst incorporating the gentle slope necessary for effective drainage.
Drainage considerations cannot be overlooked in the British climate, where effective water management often determines the difference between a patio that lasts decades and one that requires expensive repairs within a few years. Your excavated area should slope away from buildings at a gradient of approximately 1:60, ensuring water flows naturally towards appropriate drainage points. This seemingly minor detail prevents water accumulation that could undermine your sub-base or cause freeze-thaw damage during winter months.
The quality of your excavation directly impacts every subsequent stage of your project. Remove all organic matter, including roots, grass, and topsoil that could decompose and create voids beneath your patio. Pay particular attention to areas where different soil types meet, as these transitions can create differential settling if not properly addressed. A well-executed excavation provides the stable foundation essential for long-term patio performance.
Sub-Base Installation: The Hidden Foundation of Success
MOT Type 1 aggregate represents the industry standard for patio sub-bases, offering the ideal combination of stability, drainage, and workability. This carefully graded material consists of crushed stone ranging from dust particles to 40mm pieces, creating a mixture that compacts to form an extremely stable foundation. When properly installed and compacted, MOT Type 1 provides the load-bearing capacity necessary to support both the weight of your paving slabs and the loads they'll experience during use.
Proper compaction technique requires a systematic approach that ensures uniform density throughout your sub-base. Spread the aggregate in layers no thicker than 50mm, compacting each layer thoroughly before adding the next. This methodical approach prevents the formation of soft spots that could cause future settling. Professional-grade plate compactors provide the most effective compaction, though smaller projects can achieve satisfactory results with careful use of a manual tamper and adequate time investment.
The moisture content of your aggregate during compaction significantly affects the quality of your finished sub-base. Slightly damp conditions provide optimal compaction characteristics, whilst overly wet or completely dry materials prove much more difficult to compact effectively. If working during dry conditions, lightly dampen your aggregate with a watering can or garden hose before compaction. Conversely, if working after recent rainfall, allow excess moisture to drain before beginning compaction work.
Mortar Bed Preparation and Slab Installation
Mortar mixing requires attention to both proportions and consistency to achieve optimal results. The standard 5:1 ratio of sharp sand to cement provides adequate strength for most domestic applications, but the moisture content determines workability and bond strength. Your finished mortar should feel slightly damp when squeezed in your hand, holding together without leaving wet residue on your skin. This consistency allows easy trowelling whilst providing the strength necessary for long-term performance.
Systematic installation prevents many common problems associated with paving projects. Begin your installation from a fixed reference point, such as the edge adjacent to your house or a previously established straight line. Working systematically from this reference ensures your pattern remains aligned and reduces the likelihood of cumulative errors that could affect your final layout. Place each slab carefully, checking level and alignment before moving to the next position.
Level management throughout the installation process requires constant attention and frequent checking. Use your spirit level regularly, checking both individual slabs and the relationship between adjacent pieces. Small adjustments made during installation prevent major corrections later in the process. Remember that consistency matters more than absolute level—a patio with a consistent slope looks professional, whilst one with varying levels appears amateur regardless of the quality of materials used.
Circle Paving Installation: Creating Stunning Focal Points
Circle paving kits offer unique opportunities to create dramatic focal points within your patio design. These sophisticated systems typically begin with a central keystone, around which successive rings of specially cut pieces create perfect geometric patterns. The precision required for circle installation exceeds that needed for standard rectangular layouts, but the visual impact justifies the additional care and attention required during installation.
Pattern alignment becomes critical when installing circle features, as even small errors in the initial rings multiply as you work outward. Most quality circle kits include detailed layout diagrams showing the correct positioning for each piece. Study these diagrams carefully before beginning installation, and consider marking key reference points on your mortar bed to guide placement of critical pieces. Taking photographs of your layout during dry fitting can provide valuable reference during the actual installation process.
Integration with surrounding paving requires careful planning to ensure your circle feature appears intentional rather than imposed. Consider how the circular pattern will interact with your overall patio layout, and plan cutting requirements for surrounding slabs accordingly. Many successful installations use circle features to break up large areas of rectangular paving, creating visual interest whilst maintaining overall design coherence.
Jointing and Finishing: The Professional Touch
Jointing techniques significantly impact both the appearance and longevity of your finished patio. Modern jointing compounds offer advantages over traditional pointing methods, providing superior weather resistance and reduced maintenance requirements. These products typically cure to form flexible joints that accommodate thermal movement whilst maintaining weather-tight seals. Follow manufacturer recommendations for application techniques and curing times to achieve optimal results.
Finishing details separate professional-looking installations from obvious DIY projects. Take time to clean mortar residue from slab surfaces before it cures, as hardened mortar proves much more difficult to remove later. Pay attention to joint consistency, ensuring uniform width and depth throughout your installation. Consider applying a quality sealer to enhance the appearance of your slabs whilst providing additional protection against staining and weather damage.
Maintenance and Long-Term Care
Preventive maintenance extends the life of your patio whilst maintaining its appearance for years to come. Regular sweeping removes debris that could stain surfaces or encourage weed growth in joints. Address spills promptly, particularly from substances like oil or red wine that can cause permanent staining. A quarterly inspection allows you to identify minor issues before they develop into major problems requiring expensive repairs.
Seasonal care requirements vary throughout the year but contribute significantly to long-term patio performance. Autumn leaf removal prevents staining and reduces slip hazards, whilst winter attention to ice clearance protects both safety and surface integrity. Spring cleaning provides an opportunity for thorough inspection and minor maintenance tasks, whilst summer use benefits from occasional deep cleaning to maintain appearance standards.
Professional intervention becomes necessary occasionally, regardless of maintenance diligence. Repointing joints every 5-7 years maintains weather protection, whilst professional cleaning can restore heavily soiled surfaces to like-new condition. Understanding when to tackle maintenance tasks yourself versus when to engage professionals helps maximise your investment whilst maintaining safety standards.
Creative Design Ideas and Project Inspiration
Circle paving applications extend far beyond simple decorative features, offering practical solutions for various garden challenges. Consider using circle kits as elegant surrounds for fire pits, creating defined seating areas that encourage social gathering. Water feature integration becomes seamless with circular layouts, providing perfect frames for fountains or reflecting pools. Even tree surrounds benefit from circular paving, protecting root zones whilst creating attractive transitions between paved and planted areas.
Colour and texture combinations provide endless opportunities for personalisation and creativity. Contrasting border treatments using different materials or colours can dramatically enhance the visual impact of your patio whilst maintaining design coherence. Consider combining smooth and textured finishes to create subtle variations that add interest without overwhelming the overall aesthetic. Regional stone colours often provide the most harmonious results, naturally complementing local architectural styles and landscape characteristics.
Integration with landscape features transforms patios from isolated paved areas into seamless extensions of your garden design. Consider how your patio will connect to existing paths, planted areas, and structural elements. Gentle curves and transitional areas often prove more successful than sharp boundaries, creating natural flow between different garden zones whilst maintaining functional effectiveness.
Why Choose DIY Building Supplies for Your Patio Project
Expert guidance forms the foundation of our service philosophy at DIY Building Supplies. Our experienced team understands the challenges facing DIY enthusiasts and provides practical solutions based on real-world experience. From initial material selection through to finishing techniques, we offer comprehensive support designed to ensure your project succeeds. Our Nottingham-based team combines local knowledge with industry expertise, providing advice specifically relevant to British conditions and requirements.
Quality assurance begins with our careful selection of suppliers and continues through our rigorous quality control processes. We partner exclusively with established British manufacturers like Marshalls, Brett Paving, and Bradstone, ensuring every product meets our exacting standards for quality and performance. This commitment to excellence means you can purchase with confidence, knowing your materials will deliver the performance and appearance you expect.
Comprehensive service extends beyond simple material supply to include technical support, project planning assistance, and after-sales care. Our goal involves supporting your success throughout every stage of your project, from initial concept through to long-term maintenance. This holistic approach ensures optimal results whilst building lasting relationships with our customers across the UK.
Transform Your Garden Today
Creating a stunning patio using paving kits and circle features represents an achievable goal for motivated DIY enthusiasts equipped with quality materials and proper guidance. The combination of pre-engineered components and comprehensive installation support removes much of the uncertainty traditionally associated with paving projects, enabling homeowners to achieve professional-quality results within realistic timeframes and budgets.
The transformation potential extends far beyond the immediate visual impact, creating outdoor living spaces that enhance both lifestyle and property value for years to come. Whether you're planning an intimate seating area for quiet contemplation or an expansive entertainment space for hosting gatherings, the principles and techniques outlined in this guide provide the foundation for success.
Ready to transform your garden with a professional-quality patio? Explore our comprehensive collection of paving kits, circle features, and installation materials at DIYBuildingSupplies.co.uk. Our expert team stands ready to support your project with technical advice, quality materials, and the comprehensive service that has made us the trusted choice for DIY enthusiasts and trade professionals across the UK.
Contact our Nottingham-based team today to discuss your specific requirements and discover how our expertise can help bring your patio vision to life. From initial planning through to final finishing touches, DIY Building Supplies provides everything you need for patio project success.


