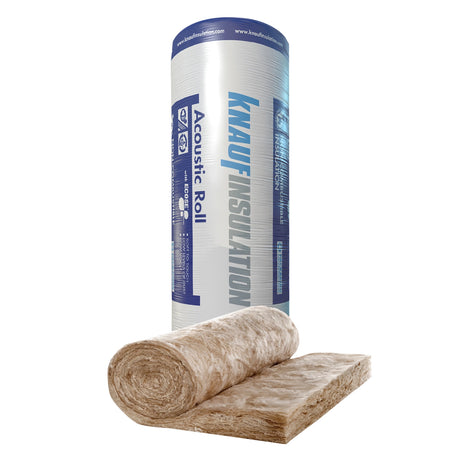
When I first installed loft roll insulation in my home three years ago, I thought the job was done. Install it, forget it, and enjoy lower energy bills forever. How wrong I was. What I've learned since then—and what DIY Building Supplies has helped me understand—is that insulation isn't a fit-and-forget solution. It's more like your garden or your car: it needs regular attention to keep performing at its best.
At DIY Building Supplies, the team has seen this story play out countless times. Homeowners invest in quality insulation materials from trusted manufacturers like Knauf or Celotex, see brilliant results initially, then watch those benefits gradually diminish because nobody told them about maintenance. The truth is, even premium insulation requires ongoing care to deliver the energy savings you're expecting over decades of use.
This guide shares what I've discovered about keeping insulation working properly long after installation day. Whether you're a first-time DIYer or someone who's been at this for years, understanding how to maintain your insulation means protecting your investment and keeping your home comfortable and efficient.
Why Insulation Performance Changes Over Time
The first thing that surprised me was learning that insulation doesn't just sit there unchanged forever. Over time, various factors start affecting how well it works. Understanding these changes helps you spot problems before they become expensive headaches.
One issue I didn't anticipate was gaps developing between sections. When I first laid everything out, it looked perfect—no spaces, everything snug. But over the months, I noticed small gaps appearing around the edges and between rolls. These gaps happen for loads of reasons: the house settles slightly, temperature changes cause materials to expand and contract, or perhaps I didn't overlap the sections quite enough during installation. Even tiny gaps of just a few millimetres can dramatically reduce your insulation's effectiveness because heat finds these weak spots and escapes right through them.
Moisture was another surprise. British homes naturally produce lots of water vapour through everyday activities like cooking, showering, and even breathing. This moisture travels upward and can accumulate in your loft space. When insulation materials get damp, their ability to trap heat drops significantly. Wet insulation can lose most of its effectiveness whilst potentially creating conditions where mould might develop—something nobody wants to discover during a routine loft inspection.
Then there's compression. Every time you climb into the loft to retrieve Christmas decorations or store boxes, you're potentially compressing the insulation fibres. Modern materials from manufacturers like Rockwool and Isover are designed to spring back, but repeated compression or heavy storage loads can permanently reduce the thickness. Since insulation works by trapping air between fibres, compressing it means fewer air pockets and reduced thermal performance.
Checking Your Insulation: What I Wish I'd Known Earlier
I used to think checking insulation meant climbing up once every few years, having a quick look around, and climbing back down. Now I understand that proper inspection involves knowing what to look for and doing it regularly. At DIY Building Supplies, they recommend checking your loft space every few months with a more thorough assessment annually.
During my quarterly checks, I focus on the obvious signs. I look for areas where the insulation has shifted away from its original position, particularly around the edges and near the loft hatch where foot traffic is heaviest. I examine the spaces around pipes, cables, and any structural elements where gaps might have opened up. I've learned to look for discolouration too—dark patches or staining often indicate moisture problems that need addressing before they worsen.
The annual inspection goes deeper. I measure the thickness of the insulation at several standard points to track whether compression is occurring. Taking photos during each inspection creates a visual record that makes it easier to spot gradual changes over time. I also use a basic moisture meter now—not an expensive one, just a simple device that tells me if materials are getting damp. Catching moisture problems early makes all the difference.
One thing I particularly watch for is any signs of pest activity. Mice and squirrels can damage insulation surprisingly quickly, and spotting the early warning signs—droppings, disturbed areas, or unusual smells—means you can address problems before they become serious.
Managing Moisture: The Lesson That Cost Me
Here's something I learned the hard way: moisture management makes or breaks insulation performance. My first winter, I noticed condensation forming on some of the rafters in my loft. I didn't think much of it at first, but by spring, I had damp patches in the insulation. The team at DIY Building Supplies helped me understand what was happening and how to fix it.
Proper ventilation forms the foundation of moisture control. Your loft needs adequate airflow to prevent condensation from accumulating. The building regulations specify minimum ventilation requirements—continuous gaps at the eaves and ridge vents—but simply meeting these minimums doesn't guarantee success. The key is ensuring nothing blocks these ventilation paths. When I first installed my insulation, I'd inadvertently pushed some of it into the eaves, partially blocking the airflow. Moving it back made an immediate difference.
The vapour barrier also plays a crucial role. Mine had several small breaches around light fittings and where cables passed through the ceiling. These tiny gaps were allowing moisture-laden air to escape into the loft space. Sealing them properly with appropriate tape made a noticeable difference to condensation levels.
I've also learned that mechanical ventilation systems in the house itself affect loft moisture levels. If your bathroom extractor isn't working properly or your kitchen ventilation is inadequate, more moisture ends up travelling into the loft space. Maintaining these systems helps protect your insulation alongside proper loft ventilation.
Fixing Common Problems I've Encountered
Through trial and error—and plenty of advice from the experts at DIY Building Supplies—I've learned how to address the most common insulation issues before they become major problems.
When I discovered compression in high-traffic areas of my loft, I initially thought I'd need to replace everything. Fortunately, the solution was simpler. For moderate compression, carefully loosening and fluffing the compressed fibres can restore much of the original thickness. The mineral wool products from companies like Superglass are particularly good at bouncing back if you catch compression early. For areas that see regular foot traffic, I've now installed proper walkway boards that distribute my weight without compressing the insulation beneath.
Gap development required a different approach. When gaps appear between sections, you need to determine why before fixing them. Some gaps form because the material has shrunk slightly as it's settled—these you can fix by repositioning the sections or adding small strips to fill spaces. Other gaps indicate more significant problems, like inadequate initial installation or material degradation, and these require more substantial remediation.
The worst discovery I made was contamination in one corner where mice had been nesting. The affected section needed complete replacement—there's no saving insulation once rodents have damaged it. Prevention proved far easier than cure. I sealed potential entry points around the roof edges and soffit boards, and I now check regularly for any signs of unwanted visitors.
Making Upgrades and Improvements
One advantage of maintaining your insulation properly is that it becomes easier to identify when upgrades might deliver additional benefits. Modern insulation materials offer significantly better performance than products from even a decade ago, and strategic improvements can boost your home's efficiency substantially.
I recently added a second layer of insulation running perpendicular to my original installation. This cross-laying technique, recommended by DIY Building Supplies, helps eliminate any remaining thermal bridges whilst ensuring complete coverage across the entire loft floor. The improvement in thermal performance was noticeable, particularly on the coldest winter nights.
The key to successful layering is maintaining proper ventilation throughout. Adding more insulation doesn't mean blocking airflow—quite the opposite. Each layer needs to work with the ventilation system to manage moisture effectively whilst maximising thermal performance.
The Value of Regular Maintenance
Looking back on my insulation journey, I wish someone had explained from the start that installation is just the beginning. Regular maintenance delivers benefits that extend far beyond preventing problems. My energy bills have remained consistently lower because the insulation keeps performing as designed. The house feels more comfortable year-round, with fewer cold spots in winter and better temperature regulation in summer.
Perhaps most importantly, proper maintenance means my original investment continues delivering value year after year. Rather than facing expensive replacement in a decade because of preventable problems, I'm confident the insulation will perform well for many years to come.
The support from DIY Building Supplies has been invaluable throughout this learning process. Their technical team understands not just the products themselves but how they perform in real-world conditions over time. Whether I'm dealing with a specific issue or planning improvements, their experience with manufacturers like Celotex, Rockwool, and British Gypsum means they can recommend solutions that actually work rather than just sounding good in theory.
Moving Forward with Confidence
Maintaining loft roll insulation isn't complicated, but it does require regular attention and understanding what to look for. The systematic approach I've developed—quarterly visual checks and annual comprehensive assessments—takes minimal time whilst providing peace of mind that everything's working as it should.
For anyone just starting their insulation journey or looking to improve an existing installation, I'd recommend connecting with the team at DIY Building Supplies early in the process. Their expertise helps you avoid the mistakes I made whilst ensuring your project delivers the performance you're expecting. Whether you need advice on maintenance techniques, guidance on addressing specific problems, or materials for upgrades and improvements, their comprehensive support makes achieving optimal results much more straightforward.
Your insulation represents a significant investment in your home's comfort and efficiency. Taking the time to maintain it properly ensures that investment continues delivering returns for decades to come.


