A Complete Step-by-Step Tutorial Using Treated Timber, Battens, Insulation & Plasterboard
Building your own timber frame wall might seem daunting at first, but with the right guidance and quality materials, it's an incredibly rewarding DIY project that can transform your space whilst saving you significant money. Whether you're creating partition walls for your home, constructing a garden office, or adding an extension to your property, understanding the fundamentals of timber frame construction will serve you well. At DIY Building Supplies, we've helped thousands of customers across the UK successfully complete these projects, and we're here to guide you through every step of the process.
Timber frame walls offer exceptional versatility and practicality for modern construction projects. Unlike traditional masonry construction, timber framing allows you to create custom-sized walls that perfectly fit your specific requirements, whether you're dividing a large room into smaller spaces or building an entirely new structure. The lightweight nature of timber construction makes it ideal for projects where structural loading is a concern, yet it provides excellent strength and stability when properly constructed. What's more, timber frame walls can be easily modified or relocated in the future, offering flexibility that solid walls simply cannot match.
The cost-effectiveness of building your own timber frame wall cannot be overstated. Professional contractors typically charge between £40-80 per square metre for basic partition wall construction, but by sourcing quality materials yourself and following proper techniques, you can achieve the same results for roughly 30-40% of that cost. Additionally, timber frame construction provides outstanding opportunities for insulation, allowing you to create highly energy-efficient walls that will reduce heating costs for years to come. The ability to incorporate services such as electrical wiring and plumbing within the wall cavity makes this construction method particularly practical for modern living requirements.
Essential Tools & Materials: Building Your Foundation for Success
The success of any timber frame wall project begins with selecting the appropriate materials and having the right tools at your disposal. Quality materials form the backbone of a durable, long-lasting wall, and this is where partnering with a trusted supplier makes all the difference. At DIY Building Supplies, we stock only premium-grade materials from leading UK manufacturers, ensuring your project benefits from the reliability and performance that comes with established industry expertise.
Treated timber studs form the structural skeleton of your wall, and choosing the correct dimensions is crucial for both strength and practicality. For most internal partition walls, 38mm x 89mm (2" x 4") treated timber provides excellent strength whilst minimising the wall's overall thickness. However, for walls that will carry additional loads or require enhanced insulation, 47mm x 100mm (2" x 4" nominal) studs offer superior performance. UK suppliers like Tanalised and BSW Timber produce exceptional treated timber that resists moisture, decay, and insect damage, making them ideal for construction in kitchens, bathrooms, or any areas where humidity might be a concern.
Timber battens serve multiple crucial roles in your construction, from providing additional fixing points to creating service voids for electrical installations. Standard 25mm x 50mm battens work perfectly for most applications, though you might require 38mm x 38mm battens for specific fixing requirements. The quality of your battens directly impacts the ease of installation and final finish quality, so investing in kiln-dried, straight timber from reputable suppliers pays dividends during construction.
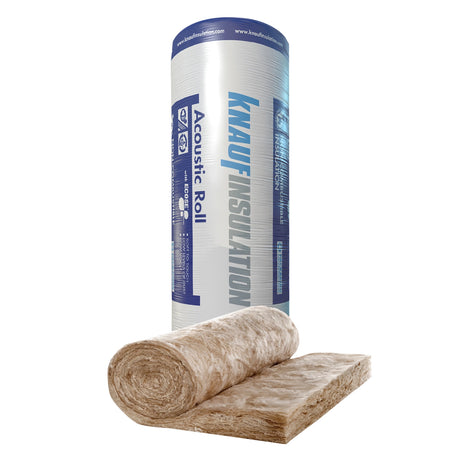
Insulation selection depends entirely on your specific requirements and the wall's intended use. PIR (Polyisocyanurate) boards from manufacturers like Celotex or Kingspan offer exceptional thermal performance with relatively thin profiles, making them ideal where space is at a premium. These rigid boards typically achieve R-values of 6-7 per inch, significantly outperforming traditional materials. Mineral wool insulation from Knauf or Rockwool provides excellent acoustic properties alongside good thermal performance, making it perfect for partition walls where sound reduction is important. For projects requiring maximum acoustic performance, specialist acoustic mineral wool can reduce sound transmission by up to 45dB when properly installed.
Plasterboard selection requires careful consideration of the wall's location and intended use. Standard 12.5mm plasterboard suits most internal applications, providing good surface quality at an economical price point. Moisture-resistant boards become essential in bathrooms, kitchens, or any areas with elevated humidity levels, offering enhanced performance through special additives that resist moisture absorption. Fire-rated plasterboard may be required for certain applications, particularly in commercial buildings or areas where building regulations specify enhanced fire resistance. Leading UK manufacturers like British Gypsum and Siniat produce comprehensive ranges that meet all common specification requirements.
Essential tools for your project include a power drill with both drilling and driving capabilities, a circular saw or mitre saw for accurate cuts, a spirit level (ideally 1200mm length for checking stud alignment), utility knife for cutting insulation and membranes, measuring tape, square, and appropriate safety equipment including eye protection and dust masks. Having quality tools makes the construction process significantly more enjoyable and ensures professional-quality results.
Step 1: Planning and Measuring - The Foundation of Success
Proper planning transforms a potentially chaotic project into a smooth, efficient construction process. The time invested in accurate measuring and layout planning pays enormous dividends throughout the build, preventing costly mistakes and ensuring your finished wall meets both your practical needs and aesthetic expectations. Professional builders understand that successful projects are won or lost during the planning phase, and the same principle applies to DIY construction.
Begin by carefully determining your wall's exact height, length, and the optimal stud spacing for your specific application. Standard stud spacing in the UK follows either 400mm centres or 600mm centres, with the choice depending on your plasterboard dimensions and loading requirements. 400mm centres provide superior strength and are essential for walls that will support heavy fixtures like wall-mounted televisions or large mirrors. 600mm centres suit most partition walls where loading will be minimal, and this spacing aligns perfectly with standard 1200mm wide plasterboard sheets, minimising waste and ensuring strong fixing points at board edges.
Mark your wall layout directly onto the floor and ceiling using a chalk line or pencil, ensuring absolute accuracy in your measurements. This physical marking serves as your reference throughout construction and helps identify any potential obstacles before you begin cutting timber. Take particular care to verify that your layout is perfectly square using the 3-4-5 triangle method or a large builder's square, as any deviation from square will compound throughout the build, potentially causing significant problems during plasterboard installation.
Critical safety check: Before proceeding with any construction, thoroughly investigate the intended wall location for existing services. Use a cable detector to identify electrical wiring, and check building plans if available to locate plumbing runs. Contact your local building control office if you're unsure about structural implications, particularly if your wall will run parallel to or intersect with existing load-bearing elements. This preliminary investigation prevents potentially dangerous situations and costly remedial work later in the project.
Step 2: Cutting and Assembling the Frame - Precision in Action
The assembly phase transforms your careful planning into physical reality, and precision during this stage directly impacts the quality of your finished wall. Professional timber frame construction relies on accurate cutting and methodical assembly techniques that ensure structural integrity whilst maintaining the efficiency that makes this construction method so appealing for DIY projects.
Cut your timber components to the exact lengths determined during planning, starting with the top plate (head plate) and sole plate (bottom plate), which should match your wall's overall length. Vertical studs should be cut to the wall height minus the combined thickness of both plates, typically resulting in studs approximately 2390mm long for standard 2400mm ceiling heights. Use a quality mitre saw or circular saw with a sharp blade to ensure clean, square cuts that will fit together precisely without gaps or misalignment.
Assembly on the floor provides the most efficient and accurate method for frame construction. Lay the top and bottom plates parallel to each other, separated by your calculated stud length, then mark stud positions on both plates simultaneously to ensure perfect alignment. Position your first stud at each end of the plates, then mark remaining stud positions according to your chosen spacing. When marking 400mm centres, your studs should be positioned at 400mm, 800mm, 1200mm, and so forth, measuring from the same end consistently.
Fix studs between the plates using either 100mm timber screws or 90mm frame nails, depending on your preference and available tools. Screws provide superior holding power and allow for easier adjustments if necessary, whilst nails offer speed of installation for experienced builders. Drive fixings through the plates into the stud ends, ensuring each connection uses at least two fixings for adequate strength. Check that each stud sits perfectly perpendicular to the plates using a square before securing.
Noggins (horizontal cross-braces between studs) significantly enhance your frame's rigidity and provide additional fixing points for heavy items. Install noggins at mid-height for walls up to 2400mm tall, or at third-height intervals for taller walls. Cut noggins to fit snugly between studs and fix them using skew-nailing or metal hangers for the strongest connection. This additional step transforms a basic frame into a robust structural element capable of supporting significant loads.
Step 3: Fixing the Frame to Floor, Ceiling, and Walls - Securing Your Structure
The transition from assembled frame to installed wall structure requires careful attention to both structural connection and precise alignment. This phase determines your wall's long-term stability and its integration with the existing building structure, making accuracy and secure fixing absolutely essential for successful completion.
Standing the frame requires at least two people for safety and control, particularly with longer walls. Lift the assembled frame carefully, ensuring it doesn't twist or distort during the process, and position it accurately against your marked layout lines. The frame's weight distribution makes lifting easier when one person supports each end, though additional helpers become valuable for walls exceeding 3 metres in length.
Use a spirit level to verify that the frame sits perfectly vertical in both directions before securing any fixings. Check the frame's alignment against your floor and ceiling marks, making minor adjustments as necessary to achieve perfect positioning. Any deviation from vertical will cause problems during plasterboard installation and may affect the wall's long-term stability, so take time to achieve accuracy at this critical stage.
Secure the sole plate to the floor using appropriate fixings for your floor construction. Concrete floors require masonry bolts or heavy-duty plugs and screws, typically at 600mm centres with additional fixings within 150mm of each end. Timber floors need substantial wood screws driven into the floor joists, requiring careful measurement to ensure screws hit solid timber rather than just floorboards. In both cases, use fixings capable of withstanding significant shear loads, as the sole plate connection resists lateral forces that could destabilise the wall.
Fix the head plate to the ceiling using similar principles, ensuring fixings penetrate into solid structural elements rather than just plasterboard. Timber ceiling joists provide ideal fixing points when the wall runs perpendicular to joist direction, whilst walls running parallel to joists require additional structural considerations. Concrete ceilings demand appropriate masonry fixings, and you may need to use expanding anchor bolts for maximum security.
Connect to existing walls where your new wall meets existing structures, using angle brackets or direct screwing through the frame into wall studs. These connections transfer loads from your new wall into the existing structure whilst preventing movement that could cause cracking at the junction. Use expanding foam or flexible sealant to fill any gaps between your frame and existing surfaces, ensuring weatherproofing and improving acoustic performance.
Step 4: Adding Insulation - Maximising Performance and Comfort
Insulation transforms your timber frame wall from a basic room divider into a high-performance building element that enhances comfort, reduces energy consumption, and provides acoustic benefits. The selection and installation of appropriate insulation materials directly impacts your wall's long-term performance, making this stage crucial for achieving professional-quality results.
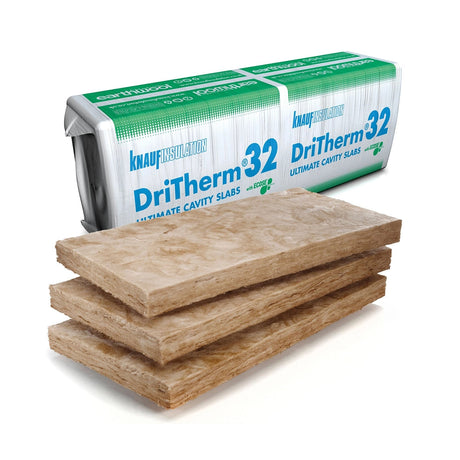
Mineral wool insulation from leading manufacturers like Knauf Earthwool or Rockwool RW3 offers exceptional versatility for timber frame applications. These materials provide excellent thermal performance with R-values typically ranging from 3.8 to 4.2 per 100mm thickness, whilst their acoustic properties make them ideal for partition walls where sound reduction is important. The friction-fit nature of mineral wool allows it to hold securely between studs without additional fixing, whilst maintaining its insulating properties over time without settling or degradation.
Installation technique significantly affects mineral wool's performance characteristics. Cut insulation batts approximately 10-15mm wider than the stud spacing to ensure a snug fit that eliminates thermal bridging whilst avoiding over-compression that reduces effectiveness. Use a sharp knife to make clean cuts, and install the insulation with the vapour-resistant facing (if present) towards the heated side of the wall. Take care to fill the entire cavity depth without leaving gaps or compressed areas that could compromise thermal performance.
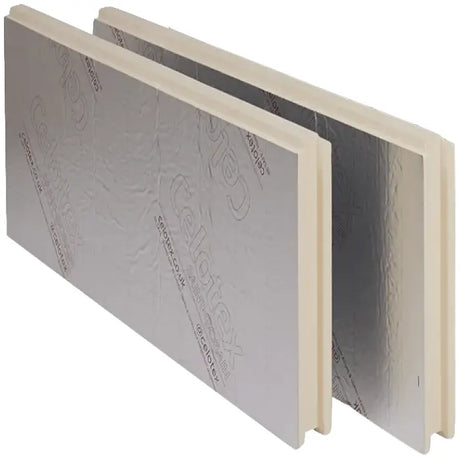
PIR board insulation from manufacturers like Celotex GA4000 or Kingspan TP10 provides superior thermal performance in thinner profiles, making it ideal where wall thickness is constrained. With R-values typically exceeding 6.5 per 100mm thickness, PIR boards deliver exceptional energy efficiency whilst their rigid nature provides structural benefits to the overall wall assembly. The closed-cell structure of PIR insulation also provides excellent moisture resistance, making it suitable for applications where humidity might be a concern.
Cut PIR boards precisely to fit between studs, aiming for a tight fit that eliminates gaps whilst avoiding compression that could damage the board's cellular structure. Use a fine-toothed saw or sharp knife for clean cuts, and seal any unavoidable gaps with expanding foam designed for use with rigid insulation. The reflective foil facings on many PIR boards provide additional thermal benefits when facing air gaps, so consider their orientation during installation to maximise performance.
Multifoil insulation systems like YBS SuperQuilt or Actis Triso-Super offer unique benefits where space is extremely limited or where enhanced vapour control is required. These sophisticated systems combine multiple reflective layers with insulating cores to achieve good thermal performance in minimal thickness. Whilst they cannot match the raw thermal performance of thicker traditional insulations, multifoils excel in retrofit applications or where achieving airtightness is particularly challenging.
Step 5: Installing Vapour Barrier or Breather Membrane - Managing Moisture Effectively
Moisture management represents one of the most critical aspects of modern wall construction, with improper vapour control leading to condensation problems that can compromise both structural integrity and occupant health. Understanding the principles of vapour movement and selecting appropriate membrane materials ensures your wall performs optimally throughout its service life whilst preventing costly moisture-related problems.
Internal partition walls between heated spaces typically require vapour control layers on the warm side of the insulation to prevent moisture migration from high-humidity areas into the wall cavity. This is particularly crucial in bathrooms, kitchens, or any rooms where elevated humidity levels are common. Polythene sheeting provides basic vapour control at economical cost, whilst specialist vapour control membranes from manufacturers like Pro Clima offer enhanced performance with improved handling characteristics and greater durability.
Install vapour control layers with particular attention to achieving continuous coverage without gaps or tears that could compromise effectiveness. Overlap joints by at least 150mm and seal with appropriate tape designed for vapour barrier applications. Pay special attention to connections around service penetrations, using purpose-made grommets or sealants to maintain the membrane's integrity. The goal is creating a continuous barrier that prevents moisture migration whilst allowing controlled drying if moisture does enter the wall assembly.
External walls or those exposed to weather require breather membranes on the exterior face that allow moisture vapour to escape whilst preventing liquid water ingress. These sophisticated materials use microporous technology to achieve high vapour permeability whilst maintaining excellent water resistance. Products like Tyvek Housewrap or Klober Permo provide proven performance in UK conditions, offering the breathability essential for preventing condensation problems whilst protecting against wind-driven rain.
Installation technique dramatically affects membrane performance, regardless of the specific product chosen. Ensure membranes remain taut during installation to prevent sagging that could create moisture traps, and use appropriate fixings that won't compromise the membrane's integrity. Tape all seams with compatible tape systems, and pay particular attention to junctions with windows, doors, or other building elements where water ingress is most likely to occur.
Airtightness considerations have become increasingly important with modern energy efficiency requirements. Proper sealing of all penetrations, joints, and connections helps achieve the low air leakage rates demanded by current building standards whilst preventing draughts that compromise comfort and energy efficiency. Use expanding foam sparingly around service penetrations, as excessive foam can create thermal bridges, and always choose products compatible with your chosen membrane materials.
Step 6: Plasterboarding - Creating the Perfect Finish
Plasterboard installation transforms your structural frame into a finished wall surface ready for decoration, and the quality of this work directly determines your project's final appearance and durability. Professional-standard plasterboarding requires attention to both technical requirements and aesthetic considerations, ensuring your wall integrates seamlessly with existing room finishes whilst providing the smooth, flat surface essential for quality decorating.
Plasterboard selection must align with your wall's specific requirements and environmental conditions. Standard 12.5mm plasterboard suits most internal partition applications, providing excellent surface quality whilst remaining economical for large areas. The additional mass of 12.5mm boards compared to thinner alternatives also contributes to improved acoustic performance, making them preferable for walls where sound reduction is important. British Gypsum Gyproc WallBoard represents the industry standard, offering consistent quality and reliable performance that has made it the choice of professional plasterers for decades.
Moisture-resistant plasterboard becomes essential in areas where humidity levels exceed normal domestic conditions. Bathrooms, kitchens, utility rooms, and any spaces with limited ventilation require boards specifically designed to resist moisture absorption whilst maintaining structural integrity. Gyproc Moisture Resistant boards incorporate special additives that prevent the degradation that affects standard boards in high-humidity environments, whilst their green-tinted core provides easy identification during installation.
Installation technique significantly affects both the speed of installation and quality of the finished surface. Begin by measuring and cutting boards to fit accurately, allowing small gaps at floor and ceiling level that will be covered by skirting boards and coving. Use a sharp knife to score the face paper, then snap the board cleanly over a straight edge before cutting through the back paper for a perfect edge. This technique produces cleaner cuts than sawing whilst eliminating the dust and noise associated with power cutting.
Fix plasterboard using appropriate drywall screws driven into the timber frame at 200mm centres around the board perimeter and 300mm centres across intermediate studs. Position screws at least 10mm from board edges to prevent cracking, and drive them just below the surface without breaking the face paper. The slight depression created by properly driven screws will be filled during the finishing process, creating an invisible fixing that doesn't compromise the wall's appearance.
Stagger board joints both horizontally and vertically to enhance structural integrity and reduce the visibility of joints in the finished surface. Avoid aligning joints between adjacent boards, and ensure that butt joints always occur over solid timber support. This approach distributes loads more effectively whilst creating a stronger, more durable wall surface that resists cracking under normal building movement.
Cut accurate openings for electrical sockets, switches, and other services using appropriate hole-cutting tools that produce clean edges without damaging surrounding board areas. Take precise measurements and transfer them carefully to the board face, remembering that accuracy during cutting eliminates the need for extensive filling and patching later in the process.
Optional Finishing Touches - Achieving Professional Standards
The difference between a competent DIY job and professional-quality work often lies in the attention paid to finishing details and the willingness to invest time in achieving exceptional standards. These optional steps transform your functional wall into a seamless part of your room's architecture whilst providing the smooth, defect-free surface that makes decorating both easier and more effective.
Jointing and finishing plasterboard seams requires patience and skill but produces results that rival professionally plastered surfaces. Begin by applying jointing compound to all board seams using a filling knife, embedding paper tape or mesh tape into the compound whilst it remains workable. The tape reinforces the joint whilst the compound fills any irregularities, creating a continuous surface across the junction between boards. Gyproc Easi-Fill provides excellent working characteristics for DIY applications, remaining workable long enough for careful application whilst setting reliably for subsequent coats.
Apply jointing compound in thin, even coats rather than attempting to achieve perfection in a single application. The first coat should fill the joint and embed the tape, whilst subsequent coats feather the compound over a wider area to eliminate any ridge that might show through paint or wallpaper. Sand lightly between coats using fine-grade abrasive paper, taking care not to damage the face paper on surrounding board areas. This methodical approach produces professional-quality results that are indistinguishable from plastered finishes.
Screw head treatment requires similar attention to detail, with each fixing point requiring filling to create an invisible connection. Apply compound generously over screw heads, ensuring complete coverage that fills the depression created during installation. Sand smooth when dry, and apply additional coats if necessary to achieve a perfectly flat surface. The goal is eliminating any visual indication of the fixing positions whilst maintaining the structural integrity provided by proper screw installation.
Skirting board installation provides the opportunity to add architectural interest whilst concealing the junction between wall and floor. Choose skirting profiles that complement your room's style, whether traditional ogee patterns for period properties or clean, square-edged profiles for contemporary spaces. MDF skirting boards offer excellent value and consistent quality, whilst solid timber options provide enhanced durability and the ability to achieve custom profiles through careful selection.
Cut skirting boards accurately using a mitre saw to achieve perfect joints at internal and external corners. The precision of these cuts directly affects the visual impact of the installation, with tight, gap-free joints creating the crisp, professional appearance that distinguishes quality work. Use appropriate adhesive and mechanical fixings to secure skirting boards, ensuring they remain firmly attached whilst accommodating normal building movement.
Electrical installation often requires coordination with your wall construction, particularly where switches and sockets will be surface-mounted on the new wall. Plan these positions during the frame construction phase, installing additional noggins or backing pieces where necessary to provide secure fixing points. Use appropriate cable management techniques to route wiring safely through the frame whilst maintaining the insulation's integrity and avoiding damage to vapour control layers.
Common Mistakes to Avoid - Learning from Experience
Understanding the pitfalls that commonly affect timber frame wall construction helps ensure your project proceeds smoothly whilst achieving professional-quality results. These mistakes often seem minor during construction but can have significant consequences for long-term performance, structural integrity, or aesthetic quality. Learning from the experience of others prevents costly remedial work and ensures your investment in quality materials achieves its full potential.
Using inappropriate timber in damp or humid environments represents one of the most serious errors in timber frame construction. Untreated timber exposed to elevated moisture levels will inevitably suffer from decay, potentially compromising structural integrity whilst creating health risks from mould growth. Always specify treated timber for kitchens, bathrooms, utility rooms, or any external applications where moisture exposure is likely. The modest additional cost of treated timber provides insurance against problems that could require complete wall reconstruction.
Inadequate or absent vapour control causes condensation problems that can remain hidden until significant damage has occurred. Heated rooms generate substantial amounts of water vapour that will migrate into wall cavities unless properly controlled. This moisture can condense within the insulation or on cold surfaces, reducing thermal performance whilst creating conditions favourable for mould growth. Always install appropriate vapour control layers in heated spaces, paying particular attention to achieving continuous coverage without gaps or tears.
Poor stud spacing compromises both structural integrity and plasterboard fixing quality, leading to walls that feel flimsy whilst providing inadequate support for fixtures and fittings. Spacing studs too widely creates spans that exceed plasterboard's load-bearing capabilities, resulting in sagging or cracking under normal loading. Conversely, spacing studs too closely wastes materials whilst creating unnecessary thermal bridging. Stick to proven spacing standards of 400mm or 600mm centres, choosing the closer spacing where enhanced strength is required.
Inadequate insulation or poor installation technique eliminates the energy efficiency benefits that make timber frame construction so attractive. Compressed insulation loses much of its effectiveness, whilst gaps between insulation and frame members create thermal bridges that compromise overall performance. Take time to install insulation properly, ensuring complete coverage without compression or gaps. The small additional effort required for proper installation pays dividends in reduced energy costs and improved comfort throughout the wall's service life.
Ignoring building regulations can have serious consequences ranging from enforcement action to insurance implications if problems occur. Modern building regulations encompass structural requirements, fire safety considerations, thermal performance standards, and accessibility requirements that affect timber frame construction. Consult your local building control department early in the planning process to understand which requirements apply to your specific project, and ensure compliance throughout construction.
Conclusion - Your Path to Construction Success
Building a timber frame wall represents an excellent introduction to serious DIY construction, combining achievable techniques with genuinely useful results that enhance your property's functionality and value. The skills developed during this project transfer directly to more ambitious construction work, whilst the confidence gained from successful completion encourages further development of your building capabilities. Most importantly, you'll have created a custom solution that perfectly meets your specific requirements whilst saving substantial money compared to professional installation.
The key to success lies in understanding that quality results come from quality materials properly installed using proven techniques. Rushing the planning phase or compromising on material specifications inevitably leads to disappointing results that may require costly remedial work. Conversely, investing time in careful planning and sourcing quality materials from trusted suppliers creates the foundation for outstanding results that will provide satisfaction for years to come.
Your partnership with DIY Building Supplies extends beyond simple material supply to encompass the technical support and practical advice that makes the difference between struggling through a project and enjoying the construction process. Our team's extensive experience with timber frame construction, combined with our relationships with leading UK manufacturers, ensures you have access to both quality materials and expert guidance throughout your project.
The knowledge gained from building your first timber frame wall opens doors to increasingly ambitious projects, from complete room alterations to substantial extensions that can transform your property. Each project builds upon previous experience whilst introducing new challenges that develop your skills and confidence. This progression from simple projects to complex construction work represents one of the most rewarding aspects of serious DIY building, providing both practical benefits and personal satisfaction that purchased solutions simply cannot match.
Ready to Get Started? Your Next Steps to Success
Transform your vision into reality with confidence, knowing that every material in your project comes from trusted UK manufacturers who share our commitment to quality and performance. Our comprehensive range of treated timber, battens, insulation, and plasterboard provides everything you need for professional-quality results, whilst our technical support team ensures you have the guidance necessary for successful completion.
Visit DIYBuildingSupplies.co.uk today to explore our complete range of building materials, access detailed technical specifications, and discover how our competitive pricing makes quality construction more affordable than ever. Our online platform provides the convenience of 24/7 ordering combined with the expertise of a traditional builders' merchant, ensuring you receive both excellent value and professional support.
Contact our technical team for personalised advice on your specific project requirements. Whether you need help with material selection, quantity calculations, or technical specifications, our experienced professionals are here to ensure your project succeeds. Your success is our success, and we're committed to providing the materials, knowledge, and support that make outstanding results achievable for every customer.
🛒 Shop All Building Materials → DIYBuildingSupplies.co.uk
📞 Speak to Our Experts → Technical Support Available
🚛 Fast UK Delivery → Quality Materials Direct to Your Door


